


Step-by-Step Guide to Implement Google Consent Mode Using Privy CMP
Implementing Google Consent Mode with Privy CMP ensures that your website handles user consent properly and complies with privacy regulations. Follow the steps below to set it up effectively.
Checks Before We Begin
1. Privy CMP Script
Ensure that the script tag provided by the Privy Consent Manager Platform is embedded correctly in your website’s <head> section. This script is essential for capturing user consent and ensuring that the consent preferences are passed to Google Consent Mode.
2. Google Tag Manager (GTM) Installation
Verify that Google Tag Manager is installed and functioning correctly on your website. GTM acts as the bridge to manage your website's tags and ensure they comply with user consent signals.
3. Matching GTM Container ID
Make sure the GTM installation uses the same container ID that will be used to configure and manage tags. A mismatched container ID will result in tags not firing as intended.
1) Privy CMP Tag Setup
Go to Tags Section
Log in to your Google Tag Manager account.
On the dashboard, navigate to the Tags section in the left-hand menu.
Create a New Tag
Click on the New button to create a fresh tag configuration.
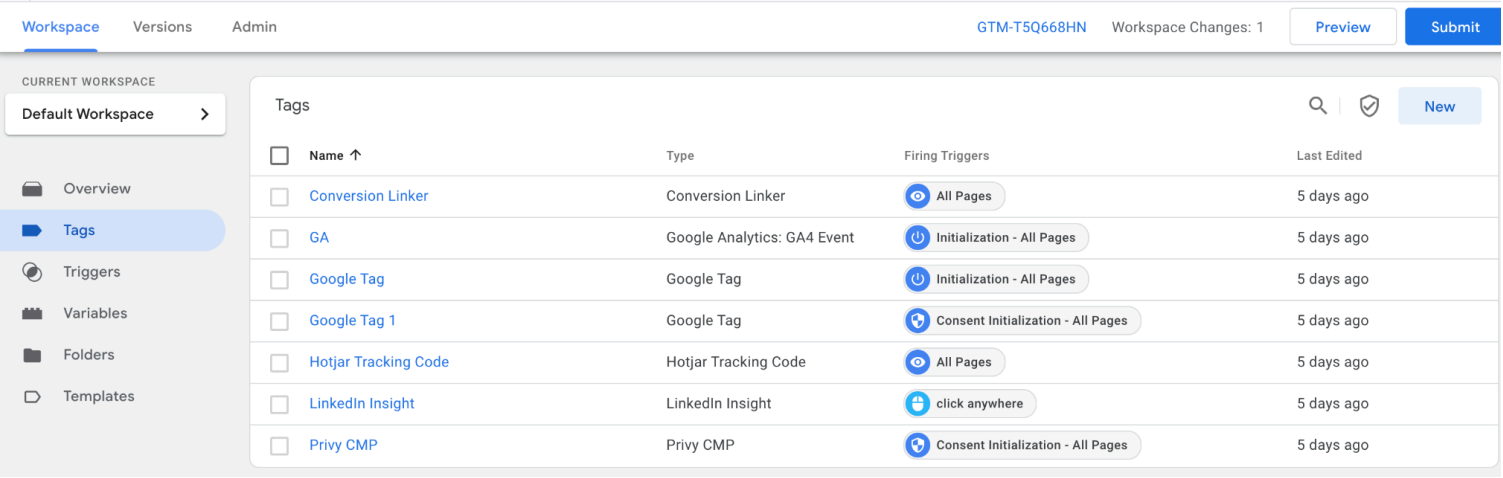
Open Tag Configuration
In the tag creation window, you'll see a section titled Tag Configuration.
Click Tag configuration to start configuring the tag.
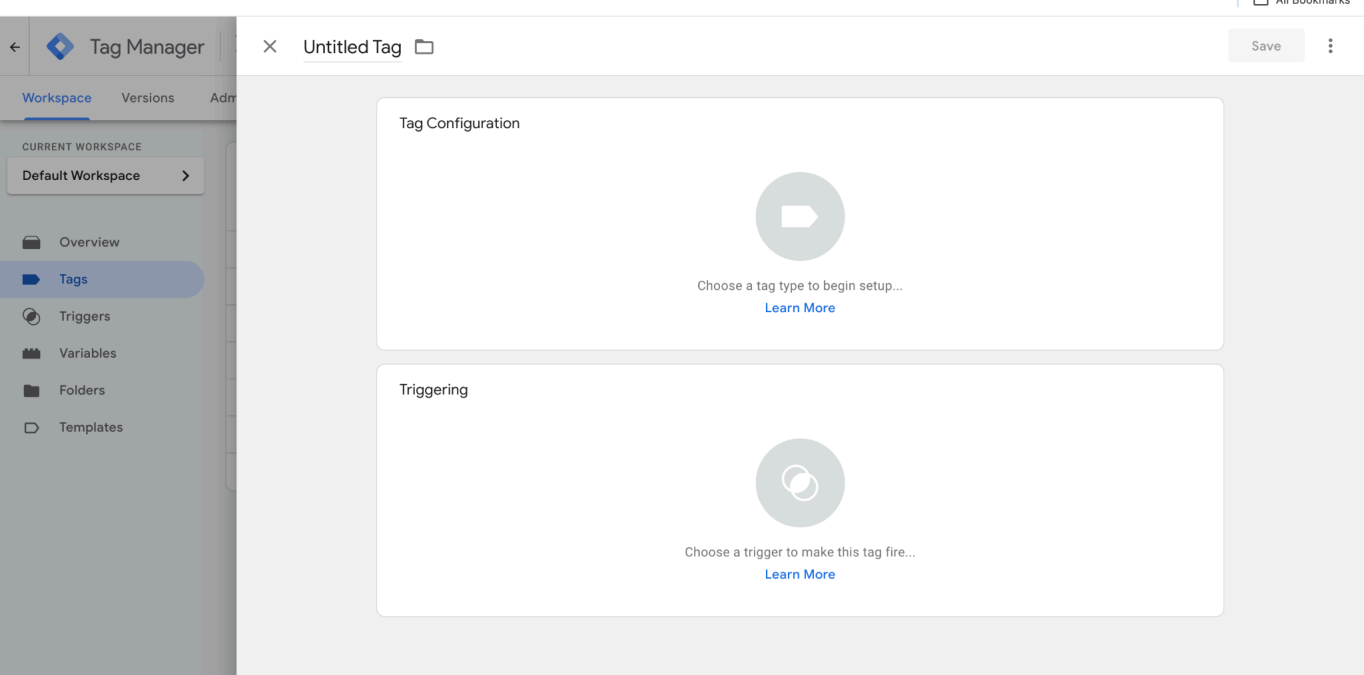
Access Community Template Gallery
In the gallery search bar, type Privy CMP.
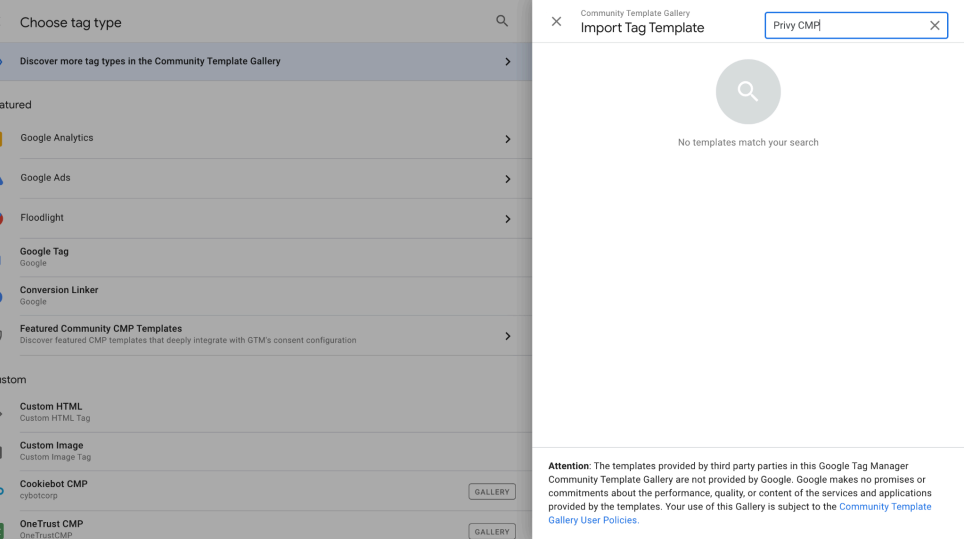
Add Privy CMP Template
Once the Privy CMP template appears in the search results, click on it to select it.
Next, click Add to Workspace to incorporate the Privy CMP template into your Google Tag Manager setup.
Choose a Trigger for the Tag
After adding the template, go to the Triggering section.
Click on Choose a Trigger and select @Consent Initialization
- All Pages@ from the list of available triggers.
This trigger ensures the tag is executed before any other tag.
Save the Tag
Review your tag configuration and trigger selection to ensure everything is set up correctly.
Once confirmed, click Save to finalize and add the tag to your Google Tag Manager setup.
2) Enabling Consent Overview
Now that the Privy CMP template has been successfully added, the next step is to configure consent for each tag. This ensures that your tags are only fired based on the user’s consent preferences. Follow the steps below:
1. Access the Admin Section
Open your Google Tag Manager account.
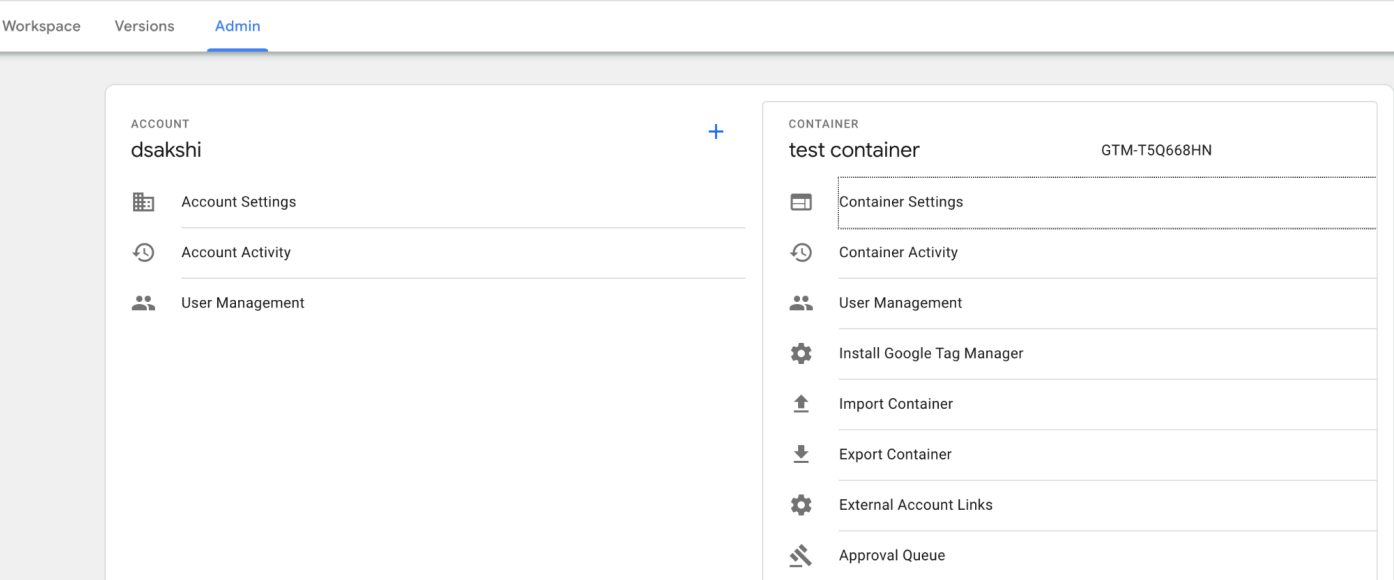
Navigate to the Admin section located in the left-hand menu at the bottom of the dashboard.
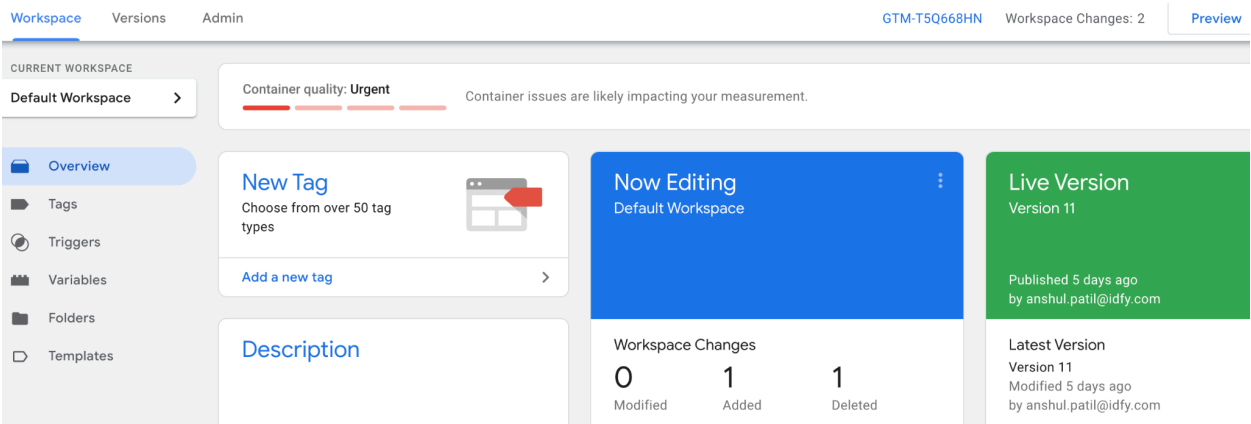
2. Open Container Settings
From the Admin section, locate and select Container Settings.
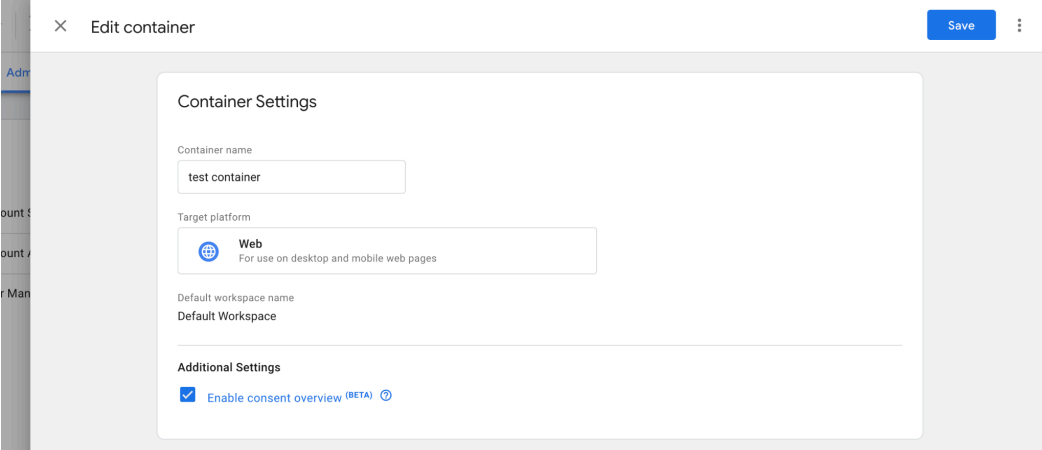
Look for a checkbox labeled something like “Enable Consent Overview (Beta)”.
Click the checkbox to enable this feature. This setting ensures that all tags within the container respect user consent preferences.
3. Save the Changes
After enabling the consent checks, click the Save button to apply the changes to the container.
Doing these steps, you should see a shield like icon beside the new option on the work space screen.

3) Configure Consent For Each Tag.
In this step we map consent with each of the tags we have in our container.
Refer to the table showing consents mapped with the category.
| Category | Consent Checks |
|---|---|
| Marketing/Advertising | ad_storage , ad_personalization, ad_user_data |
| Functional | functionality_storage','personalization_storage |
| Analytics | analytics_storage |
| Performance | analytics_storage |
Open the Consent Overview Screen
Locate the shield icon beside the New button in the top-right corner of the Tags section.
Click on the shield icon to open the Consent Overview screen.
Understand Built-In Consent Checks
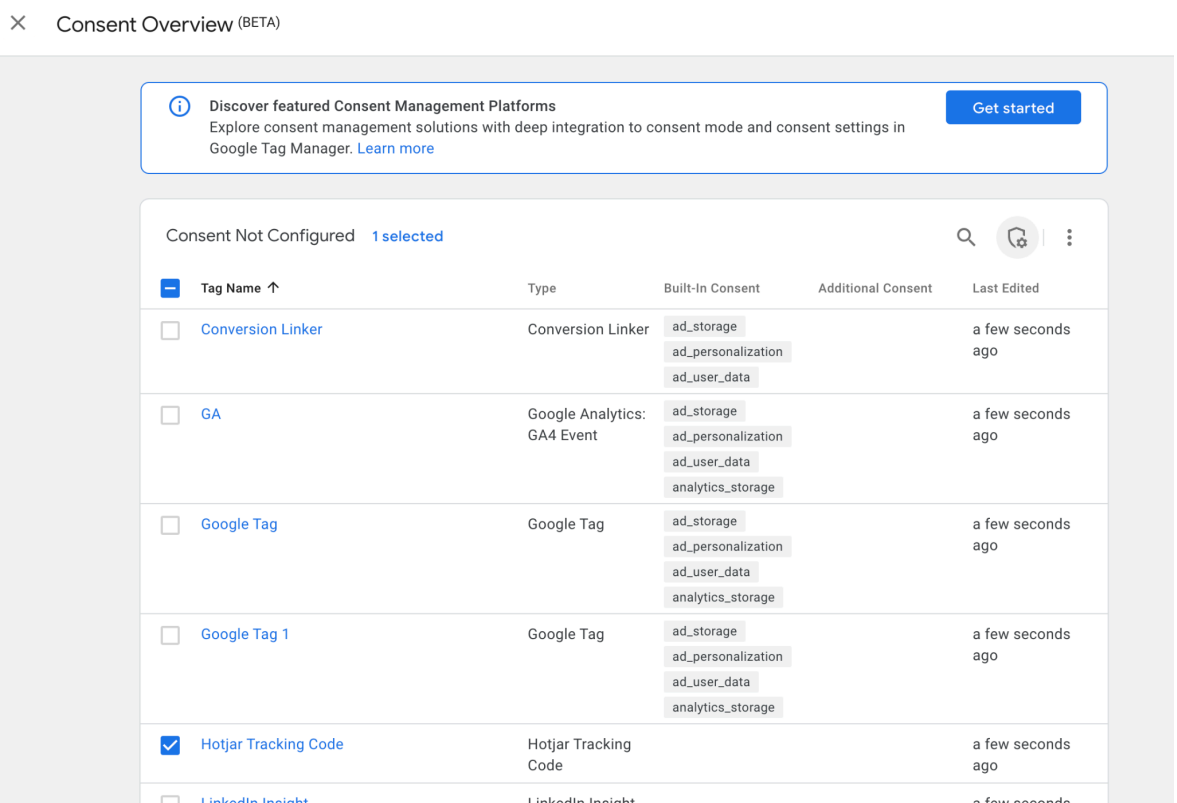
On the Consent Overview screen, you will see a list of tags and their consent settings.
Some tags have built-in consent checks, meaning they are pre-configured to check for specific types of user consent before firing.
For example, the Conversion Linker tag has built-in consent checks for the following:
- ad_storage
- ad_personalization
- ad_user_data
Review Consent Mapping
Example: If the built-in consent checks for the Conversion Linker tag include ad_storage, ad_personalization, and ad_user_data, and these purposes are mapped to Marketing in Privy CMP, the tag will only fire when the user has given consent for Marketing.
If a tag requires additional consent beyond its built-in checks, you can configure this manually:
Here are the steps, and how you can do it.
Select the Tag
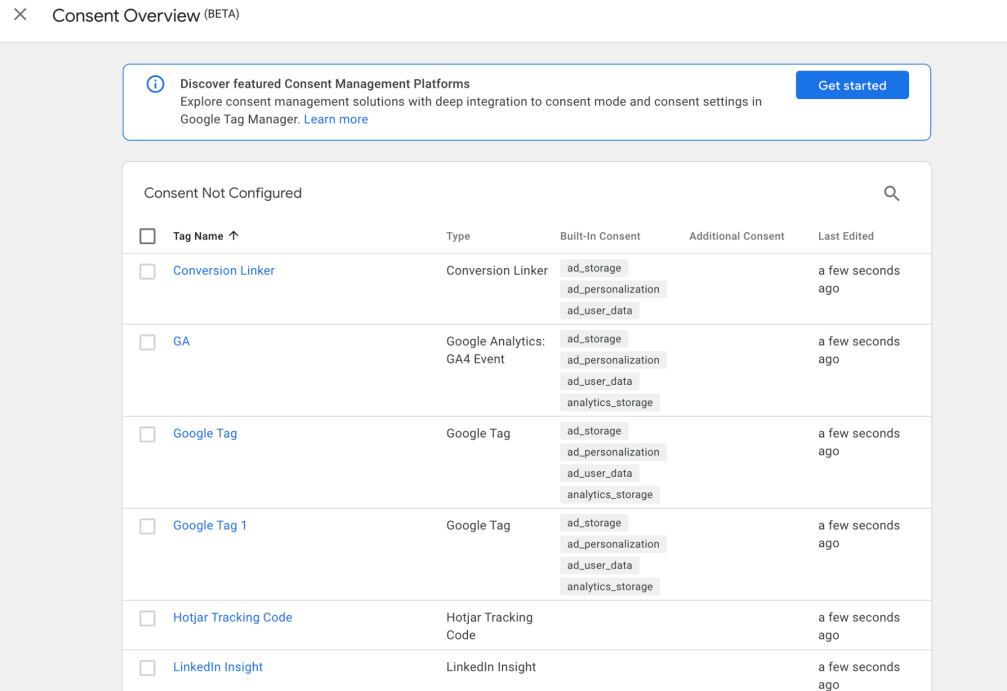
Click on the checkbox next to the tag you wish to configure.
This highlights the tag and allows you to access the consent settings.
Open Consent Settings
Once the tag is selected, click on the shield-shaped icon (or 'Shield-Settings' icon) located in the top-right corner of the screen.
This will open the consent configuration panel for the selected tag.
Configure Additional Consent
Under the consent configuration panel, navigate to the section labeled Require Additional Consent for Tag to Fire.
Enter the consent types you want to associate with the tag. For example:
- If the tag is being used for functional purposes, add functional_storage and personalization_storage as the required consents.
- If the tag is for marketing purposes then add ad_storage, ad_personalization, ad_user_data.
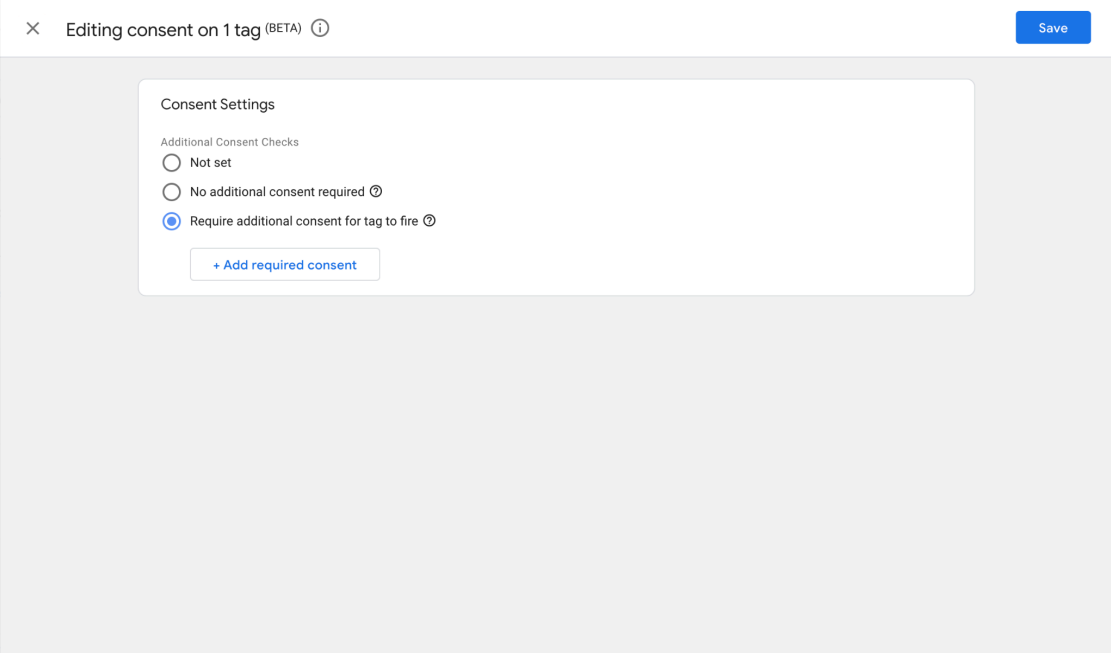
Save the Configuration
After entering the required consent types, click Save to apply the changes.
Skip Additional Consent Configuration (If Applicable)
If the selected tag does not require any additional consent:
- Click on the checkbox next to the tag.
- Open the Shield-Settings icon.
- Select No Additional Consent Required from the options.
- Click Save to confirm the changes.
Repeat for All Tags
Continue these steps for each tag in your container until the consent configuration is complete for all tags.
One all tags are configured Click Publish to take your changes live.




 shivani@idfy.com
 Unit no. 801, Skyline Icon, 804, Andheri - Kurla Rd, Chimatpada, Marol, Andheri East, Mumbai, Maharashtra 400059
 1800 123 4339